(→Trivia) |
No edit summary |
||
| Line 12: | Line 12: | ||
|Status = Deceased |
|Status = Deceased |
||
|Name = Hero of Bower Lake}} |
|Name = Hero of Bower Lake}} |
||
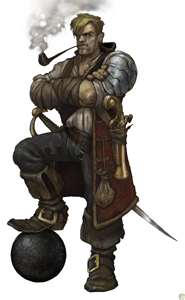
| − | The '''Hero of Bower Lake''' (commonly referred to as the '''Hero of Bowerstone''' in the ''Fable'' community, and also known as '''Sparrow''', the '''Hero of the Spire''', the '''Old Hero King/Queen''', and many other titles within the game universe) is the main protagonist |
+ | The '''Hero of Bower Lake''' (commonly referred to as the '''Hero of Bowerstone''' in the ''Fable'' community, and also known as '''Sparrow''', the '''Hero of the Spire''', the '''Old Hero King/Queen''', and many other titles within the game universe) is the main protagonist of ''[[Fable II]]''. The character may be either male or female, by choice of the player at the beginning of the game. |
The Hero is a descendant of the [[Hero of Oakvale]]; this is most commonly accepted, as [[Theresa]] states that the Hero of Oakvale was the Hero of Bower Lake's "forebear". This is also proven in the book "[[The Hero of Oakvale (book)|The Hero of Oakvale]]", which speaks of the Hero of Oakvale having a descendant who shall one day save [[Albion]]. There is more reason to believe this, with the addition of access to the treasure chest of the [[Hero of Southcliff]] in the [[Chamber of Fate]]. Out-of-game lore suggests that only the descendants of the Hero can open the chest. |
The Hero is a descendant of the [[Hero of Oakvale]]; this is most commonly accepted, as [[Theresa]] states that the Hero of Oakvale was the Hero of Bower Lake's "forebear". This is also proven in the book "[[The Hero of Oakvale (book)|The Hero of Oakvale]]", which speaks of the Hero of Oakvale having a descendant who shall one day save [[Albion]]. There is more reason to believe this, with the addition of access to the treasure chest of the [[Hero of Southcliff]] in the [[Chamber of Fate]]. Out-of-game lore suggests that only the descendants of the Hero can open the chest. |
||
Revision as of 00:20, 27 January 2020
| Warning: Spoilers This section or article may contain spoilers! |
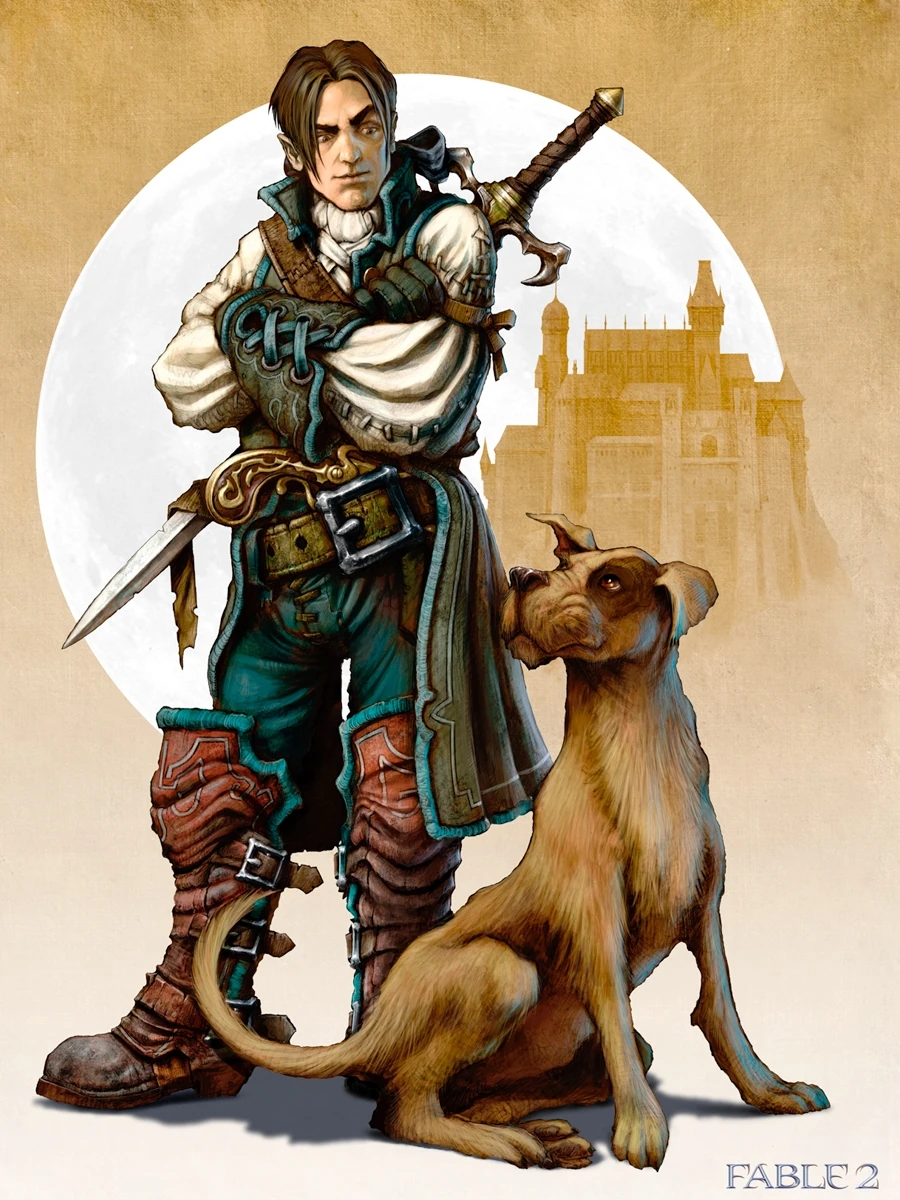
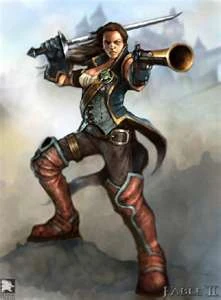
The Hero of Bower Lake (commonly referred to as the Hero of Bowerstone in the Fable community, and also known as Sparrow, the Hero of the Spire, the Old Hero King/Queen, and many other titles within the game universe) is the main protagonist of Fable II. The character may be either male or female, by choice of the player at the beginning of the game.
The Hero is a descendant of the Hero of Oakvale; this is most commonly accepted, as Theresa states that the Hero of Oakvale was the Hero of Bower Lake's "forebear". This is also proven in the book "The Hero of Oakvale", which speaks of the Hero of Oakvale having a descendant who shall one day save Albion. There is more reason to believe this, with the addition of access to the treasure chest of the Hero of Southcliff in the Chamber of Fate. Out-of-game lore suggests that only the descendants of the Hero can open the chest.
In the beginning of the game, the Hero of Bower lake is called "Sparrow" which, in the game, appears synonymous with being youthful, and prepared to set out to see the world. However, it is also possible that "Sparrow" is their real name, as opposed to "Chicken Chaser" or any other of the titles available for renaming. The Hero is more often referred to "Sparrow", including in certain cutscenes, despite their current title. If one keeps the title of "Sparrow" later in the game, villagers mock its childishness ("sparrow", or "little sparrow", is also a term of endearment, similar to "honey" or "dear", and is generally used with children, so it is also very possible that this is the case here).
The Hero of Bower Lake had a sister, Rose, who was killed by Lucien Fairfax. Theresa acts as a guardian from the moment Lucien shoots the Hero until they reach adolescence, in which they begin to explore the world.
Biography
- See Also: Fable II Storyline
Childhood
As a child, Sparrow lives in Bowerstone Old Town with their sister, Rose, in poverty after the unexplained death of their parents, dreaming of living in Fairfax Castle. One day, they are disturbed by a loud commotion from the trader Mystical Murgo, who is selling many items of no real value, including a magical mirror that "only works in complete darkness," as artifacts of the Old Kingdom. However, amongst his collection of trash, he has a true artifact, given to him by Theresa (however, the player won't find this out unless they download See the Future): An old music box with incredible power, which allows one wish. Rose is hesitant to believe this at first, voices her opinions to her sibling, and an eavesdropping Theresa who, after a few brief words, convinces the children to gather the five gold coins needed to buy the box.

While searching for the coins, Sparrow and Rose encounter other villagers, save a dog from abuse by a bully, and collect some warrants for a guard, which can either be returned to him or be sold to a local crook (this decision later changes Bowerstone for better or for worse). Regardless of the decisions made, Sparrow and Rose gather the five gold coins by posing for a picture, finding a bottle of wine, exploring a warehouse, delivering a letter, and returning the warrants. They then purchase the box. After taking it to an overlook, they make a wish to live in the castle, only to find the box vanishes from sight. An angry and disappointed Rose takes Sparrow back to their home; to their surprise, they find the dog from earlier resting at the front of the ramshackle structure. They both proceed to go to sleep.
Later, Rose is awakened by the dog barking at several guards who have been sent to retrieve them by Lord Lucien Fairfax. Rose awakens Sparrow, and they head off with the guards to Fairfax Castle. Once inside, they are greeted by the castle butler, who instructs them on proper behaviour in the castle as they are shown to Lucien's study. On the way, they are passed by Garth, an Old Kingdom scholar and "man of few words". Inside the study, Lucien is poring over old books, scrolls, and papers related to the Old Kingdom. He is curious about the box that they purchased, and asks Rose and Sparrow to step into a runic circle, which reacts to their presence. He reveals that one of the children is the "Fourth Hero" who has the ability to destroy all of his plans, as opposed to one of the three that he needs. Lucien draws a pistol and shoots Rose, killing her. After apologizing for what he "must do", he shoots Sparrow, who is knocked out of the window. After falling several stories, Sparrow lands on the cold winter ground. The dog and Theresa find Sparrow, and take them out of Bowerstone to the Gypsy Camp near Bower Lake.
Youth to Adulthood
Theresa tends to Sparrow's wounds. After Sparrow slowly recovers, it is said that they trained to become a fighter and warrior for over ten years until the day they are ready to leave the Gypsy Camp, at which point the Hero of Bower Lake heads into the Guild Cave for a final bit of training.
Theresa sends the Hero into the cave, which is actually the destroyed Heroes' Guild. After fighting some beetles, the Hero unlocks their magical Will powers and learns how to update their abilities. Soon afterwards, the Hero starts their journey, but before they can enter Bowerstone, they are told that the bandit Thag needs to be taken care of, so the Hero goes and kills Thag. Theresa turns up in the market and tells the Hero about the Tattered Spire and what Lucien is trying to do with it. The Hero is told the story of the Tattered Spire by Theresa, who then hands over some fate cards, each one telling the Hero about one of the other Heroes they must get to before Lucien. Theresa tells the Hero that Oakfield is the best place to start, so now the Hero officially starts their quest. The Hero ventures through Rookridge and gets into a few fights with bandits.
The Hero Of Strength
The Hero meets a man who has lost his son to hobbes. The Hero either kills the man and continues towards the cave to Oakfield, or takes the man along and tries to help him find his son. As the Hero enters the cave, they discover that it is filled with many hobbes, but eventually they make it through. The man finds out that his son has been turned into one of the hobbes. After the Hero kills the hobbe child, his father breaks down and cries that all the stories about children becoming hobbes were true; he loses the will to live and falls to the ground.
The Hero escapes and heads off to Oakfield. There, they find the Abbot of the Temple of Light who is looking for a bodyguard for one of his monks. He believes that the Hero would make a good bodyguard, but he still needs more proof (though, you could already be well-known and start this quest straight away) and tells the Hero to get more renown. The Hero then heads off to the local pub, the Sandgoose, where they meet Barnum, from whom the Hero earned a piece of gold from his picture taking business when they were a child. It is discovered that Barnum had bought a bridge in Rookridge and was planning to charge a toll for it, but it was then overtaken and destroyed by bandits. The Hero's quest is to rid Rookridge of the bandits.
After making their way through Rookridge, the Hero easily cleans the bandits out and kills Dash. The Hero then heads back to Barnum and, with their renown now high enough, to undertake what is likely to be their first real quest. The Abbot reveals that the other monk is none other than his own daughter, Hannah. The Hero meets Hannah, who is known by her nickname "Hammer", and Theresa says that they must find a reason to get her to become a Hero.
After going through the a small part of the Wellspring Cave, the Hero and Hammer are attacked by hollow men. After making it through the cave with the holy water, another monk, Brother Robin, enters the cave and tells Hannah that her father is being held captive by one of Lucien's men. At this, Hannah breaks off a warhammer from a nearby statue and runs to save her father. The Hero is in quick pursuit behind Hannah when tragedy strikes. Not much is known of the event, but it is thought that the Abbot had tried to disarm the gunman and was shot dead in the process. Hannah kills the gunman with a single blow and falls to her knees at the side of her dead father, crying and sobbing over his body.
The next day, the blessing of the Golden Acorn takes place on a hilltop in Oakfield overlooking the docks. The Golden Acorn is planted in the Abbot's grave. Hannah promises to get revenge for the death of her father. After a few moments, Theresa shows up and offers to tell Hannah everything. Hannah eagerly agrees and begins to go by her name of "Hammer"; Theresa and Hammer teleport back to the Guild Cave, leaving the Hero alone atop the cliff in Oakfield.
Known Quests and The Hero Of Will
There were many quests that the Hero undertook, some for fame, some for gold, and others just for joy. It is reported that the Hero helped a ghost's former lover find love again, although other reports suggest that the Hero broke the lover's heart at the request of the ghost. The Hero also helped capture Ripper as a request from Giles, or killed Giles as a request from Ripper.
The Hero returns to Theresa and Hammer at the Guild where Theresa tells them of the Hero of Will, Garth, a brilliant scholar who was formerly in Lucien's employ, but severed ties with him upon learning his true intentions. She tells the Hero to go to Brightwood where he resides and recruit him; Hammer reluctantly stays behind. Upon entry to Brightwood, the Hero sees that it has already been overrun by Lucien's Spire guards. Arriving at Brightwood Tower, Lucien's Commandant is already there and captures Garth before the Hero can get to him, escaping using an Old Kingdom artifact called a Shard.
The Hero returns to the Guild, where Theresa then tells the Hero to seek out Lucien's old butler Jeeves, who might know where Lucien's old diary is located, and who, as Hammer notes, "must have seen his share of dirty dealings." The Hero goes to The Cow and Corset at Bowerstone Market and finds Jeeves in one of the rooms. Jeeves apparently does not recognize the Hero from the night Rose died, and demands 1000 gold pieces for the location of Lucien's Diary (which the Hero must provide in order to continue with the quest). Jeeves discloses the location of where he buried the diary in a map.
Upon arriving at the diary's location at Bower Lake, the Hero is attacked by a Troll and succeeds in killing it. The Hero then brings the diary to Theresa, who translates it. By reading it, she determines that Lucien is recruiting guards from Westcliff who succeed in defeating the Crucible, to which Theresa responds by stating those who win are physically tough and mentally weak. Hammer and the Hero depart for Westcliff.
On their journey, they travel along Bandit Coast, so named as it has been overrun by bandits. They breach the barricade between the coast and the outskirts of the Westcliff Camp and continue. Shortly after, they meet a woman, Lilith, who sobs that balverines killed her husband and took her son, so Hammer volunteers them to help find the child. They reach the Howling Halls and find out that Lilith is not a woman, but a white balverine who has led them into a trap. Hammer and the Hero kill all of the balverines and find a way out of Howling Halls by making a makeshift bridge out of a pillar.
Arriving at the camp of the Crucible, Hammer and the Hero meet the announcers, Murray and Mad Dog, the latter being a Crucible record holder. Hammer is not allowed to compete, due to her insulting Mad Dog, and the Hero's dog is not allowed in, so the Hero is forced to fight alone. First however, the Hero has to complete various other quests in order to be "famous" enough to be allowed in. The Hero emerges from the Crucible triumphant, conquering all eight rounds and being greeted by new adoring fans outside. It is here that the Hero has one last chance to complete any unfinished tasks before leaving for the Spire. One of these tasks involves a battle between the Temple of Light and the Temple of Shadows, but it is unclear which side the Hero chose.
Upon completing their affairs, the Hero talks with the boat captain, who says that no personal effects, weapons, or their dog are allowed on board. Hammer promises to watch after the dog, and the Hero begins their career as a Spire guard.
Difficult Choices in the Spire
Upon arrival at the Spire, the Hero sees Lucien once again, now an older man gone mad at the idea of the Spire and its capabilities. He informs the Hero and the other guards that the world is corrupt and does not punish evil as it should, and that they stand in an instrument of change, and subsequently puts all the guards to sleep using some sort of Will spell.
Upon awakening, the Hero is fitted with Spire guard clothing and an obedience collar which drains experience away from those who do not obey. Along the way to the Commandant's Chamber, the Hero sees Bob, a man who arrived with them and appears to be friendly, and Garth, who immediately recognizes the Hero and advises patience. The Hero then meets the Commandant, who explains the "project" in greater detail, saying that their progress is not a miracle, but a product of obedience. The Hero can refuse to do anything the Commandant tells them to, resulting in their collar being activated. The Hero can withstand the pain two times, but on the third, they faint from the pain.
In a span of ten years, the Hero faces two choices. The first choice being whether to starve disobedient workers or feed them, and the second being whether to kill or spare Bob. Whether or not the Hero kills Bob makes no difference as Bob will die anyway either by the Hero's hands or the Commandant's (although you may choose to attack the Commandant instead and gain a large amount of Good points for each hit). Later, the Hero is called to the Commandant's Chamber and ordered to find a missing guard from one of the construction sites. Upon finding the guard, the Hero discovers him dead at Garth's hands. Garth, who has spent the last ten years focusing his Will, has finally progressed to the point of being able to destroy the Hero's collar and to have killed the missing guard. The Hero must now do all the fighting for the both of them as Garth has no power left.
The Hero fights their way to the Commandant's Chamber as Garth states that they're not leaving until the Commandant is dead. The Commandant appears with several guards and fights the Hero, but is killed. Garth regains his powers through the Commandant's death and opens a Cullis Gate down to the docks. The Hero and Garth make it to one of the boats and escape with a new batch of recruits.
Upon arrival at the Oakfield docks, they are met by Theresa and the Hero's dog. Theresa informs Garth that he cannot defeat Lucien on his own, and Garth takes Theresa's hand as she teleports him to the guild. She also gives the Hero all their equipment back.
The Hero of Skill
Theresa tells the Hero to go see Hammer at Rookridge Inn. Hammer soon departs after catching up with the Hero to go see a source who might have information on the Hero of Skill. Theresa then tells the Hero to take some time to recuperate, and if they have chosen to have a family, go and see them again. If the player chooses to do this, they will see that their spouse thought them to be dead and their child (if they had one) is now ten years old. The Hero may stay with their family for a while or leave immediately and receive lamentations from their spouse, asking them what happened to them in the Spire and what made them so cruel.
Theresa contacts the Hero and tells them that Hammer has information about the Hero of Skill and to return to the Guild. Upon arrival at the Guild, Garth informs the Hero that he had no idea what Lucien was planning the night that Rose died, and if he had known, he would have stopped him. Hammer arrives shortly thereafter, marking the first meeting between Garth and Hammer which is accompanied by a trade of insults. Hammer then says that she thinks the Hero of Skill is a pirate named Reaver who would make crews of other ships surrender by using his pistol to shoot the captain from afar. She says that he runs the port town of Bloodstone, surrounded on three sides by Wraithmarsh and on the fourth by ocean. Theresa notes that they can get to Bloodstone by travelling through Wraithmarsh, to which Garth has conveniently made a Cullis Gate to at Brightwood Tower. Hammer, Garth and the Hero all travel to the Tower.
Upon arrival at the tower, Spire Guards are there again and a fight ensues. Garth attempts to activate the Cullis Gate to Wraithmarsh while the Hero and Hammer fend off a great many guards and commandants. Upon activation of the gate, the Hero enters first to find themself all alone in Wraithmarsh, and subsequently gets knocked out as the Cullis Gate explodes. The Hero then gets locked in a cage by Old Gregg, who seems to think they are from Bloodstone at first. He comments that Bloodstone would be burned to the ground if there was any justice, and reckons he'll to do the same with the Hero. Upon saying this, a blanket of fog covers the area. He leaves, presumably to investigate the source of the fog. This is followed by a high-pitched scream, and the fog lifts to reveal the old man's body. He is killed by what Theresa (upon establishing contact with the Hero again) identifies as a banshee.
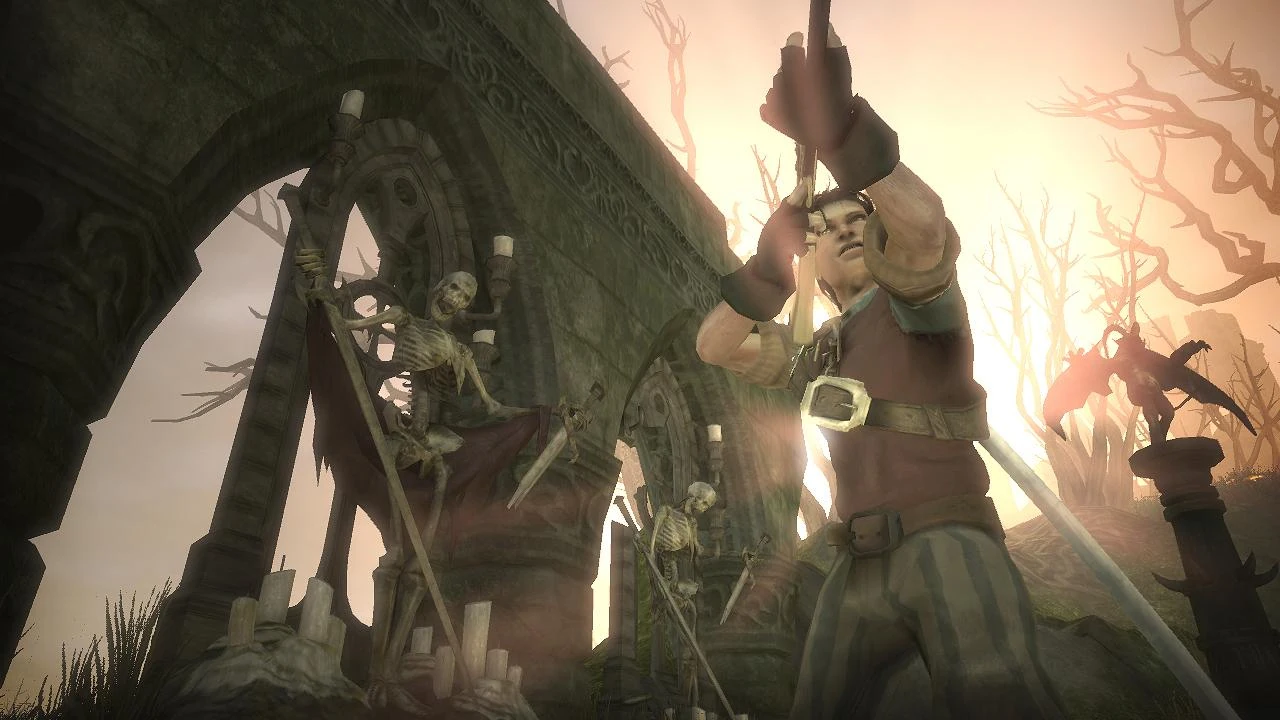
The Hero's dog comes out of the fog and retrieves the key from Old Gregg's body. Theresa says that the gate malfunctioned and Hammer and Garth were sent back to the Guild, and that the Hero must make it through Wraithmarsh on their own. Theresa identifies the sinister region as what used to be Oakvale, a village burned to the ground by bandits and later destroyed for a final time by a foolish young man who made a deal with the Shadow Court for immortality. The Hero eventually makes it through the marsh after defeating hollow men, balverines, two banshees, and a troll.
Arriving at Bloodstone, Theresa tells the Hero to go and make Reaver's acquaintance. Reaver seems glad to meet the Hero and flirts with them regardless of their gender. Reaver, before dealing with the Hero, wants them to prove to him that they are worth dealing with by increasing their renown through several quests that are available after arriving in Bloodstone. Around this time, reports suggest that the Hero found alost pirate's treasure.
After doing this, Reaver informs the Hero that he discovered that they escaped the Spire, and if they run an errand for him, he will help them. Reaver tells the Hero to deliver a seal to the Shadow Court, but there is more to the task than Reaver lets on (as noted by Theresa). Upon entering the Shadow Court and after defeating several shadows, the Hero meets a young girl who says that she and her friends were reading from a book and somehow ended up in the Court. Moments later, the Shadow Judges appear and the apparent leader informs them that whichever one of them carries the Dark Seal will sacrifice their youth and beauty so Reaver may keep his (this confirms that it was in fact Reaver who destroyed Oakvale). The Hero may keep the seal and be aged permanently or give the girl the seal, sacrificing her youth and beauty. It is unclear which the Hero chose, and Theresa justifies their choice either way. Regardless of the choice, Reaver has again fulfilled the bargain; but when the sacrifices stop, the Shadow Judges will come for him.
When returning to Bloodstone, Reaver says that while the Hero was away, he made an agreement with Lucien in which Reaver hands over the Hero for "a large heap of gold". After saying this, one of Reaver's cronies informs him that the city is under attack by Lucien's men, and that their leader is saying "find this Reaver". Reaver seems appalled that Lucien broke their agreement and temporarily allies himself with the Hero to escape from Bloodstone by fleeing down an escape tunnel built by smugglers in his study. However, they are intercepted by Lucien's men, and Reaver and the Hero must fight through them to escape to Smuggler's Beach.
After the Hero and Reaver exit the tunnels, Garth and Hammer are already outside waiting for them. Reaver then destroys the tunnels using some form of explosive and is about to flee on his escape boat, but not before it is destroyed by a Shard. Lucien's men try one more time to capture the four Heroes but fail when Garth discovers the weakness of the Shard; long, sustained Will attacks. All four Heroes then work together to destroy it. Once it is destroyed, Reaver is about to depart when Theresa shows up saying that if he does not join them, Lucien will control the world and everything in it (which motivates Reaver, because if this happens, then he will have no one to sacrifice to the Shadow Court). They then depart for Hero Hill.
The Great Weapon
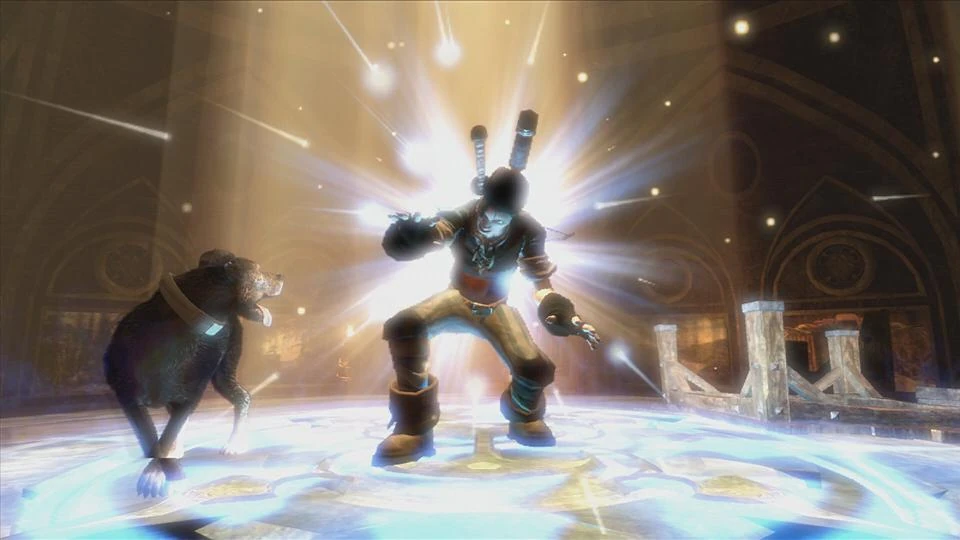
Upon arrival at Hero Hill to call forth "The Great Weapon" which will defeat Lucien, the Heroes start discussing Lucien's true intentions, but this talk is brought to a close when Theresa urges that they start the ritual in which the Hero stands in the center of the hill with the other three off to the side. Upon starting the ritual, there is a bright light as the three Hero attributes come together, and when it subsides, Hammer, Garth, and Reaver are weakened while the Hero of Bowerstone stands tall, and Theresa is gone.
Shortly after, Lucien arrives with more Shards and chastises the Heroes, saying they had enough power to build a new world and they wasted it trying to save the old one. He then teleports Reaver, Garth, and Hammer away so only he and the Hero are left on the hill. Lucien then reveals that he killed their family (if the Hero chose to have one) and "the last of the heroic bloodline shall flow out onto this hilltop." When Lucien is about to shoot the Hero, the dog jumps in the way of the bullet and is killed. It is then that Lucien seems to show pity for the Hero, saying that the last time he killed them, it tore his heart out but they were both young. It is here that Lucien shoots the Hero. After the Hero is shot, the world goes black and Theresa's voice is heard saying the same phrase she used when she rescued the Hero as a child: "Death is not your destiny today, little Sparrow."
The Perfect World
The Hero wakes up in a sort of dream world as a child where Rose is still alive, and they are living on a farm with their parents. The Hero may perform various activities on the farm, killing beetles, shooting bottles, and rounding up the chickens. Once it is late enough, Rose suggests they go to bed.
In the middle of the night, the Hero wakes up to strange music coming from outside the border of the farm. The Hero goes to investigate, with Rose following. Rose implores her sibling not to go, and that she doesn't want to be alone again. After the Hero leaves, the sky turns red and Rose screams and disappears. Along the road to investigate the music, the Hero sees several bodies all murdered brutally and eventually sees the way to put an end to all of the chaos that Lucien has brought about: The music box. Though its origins are unknown, the music box is, in fact, the Great Weapon.
After reflecting on their life, the Hero hears Rose's voice tell them that they have passed the test and have the means to defeat Lucien. The Hero then awakens at the Spire and goes to confront Lucien once and for all.
The Wish
When the Hero gets to the Spire, Lucien appears to be bending all three Heroes' power to his own Will. After remarking how astounding the Hero's power is to have cheated death a second time, Lucien attempts to put the Hero to sleep again. However, the Hero starts using the music box, and it appears to have an effect: Lucien's bond with the Heroes is broken, and he has no power left. At this point, the Hero may kill Lucien with ease or wait and Reaver will do it, remarking that he thought Lucien would never stop talking.
Shortly after, Theresa appears and tells the Hero it is time for their reward. The Hero has three choices: Sacrifice aka The Needs of the Many, in which all who died in the making of the Spire will be brought back to life, but everyone the Hero loved will remain dead; Love aka The Needs of the Few, in which all the Hero's family, including their dog and Rose, will be brought back to life, but everyone who died in the making of the Spire will remain dead; or Wealth aka The Needs of the One, in which the Hero will get a million gold, but their family and all those who died in making the Spire will stay dead. It is unclear which the Hero chose, but a letter received soon afterwards may contain the answer.
Garth says he wishes to return home to Samarkand along with Reaver (who tags along for the exotic substances and uninhibited people). Hammer wants to go north to study with the warrior monks. Reaver sarcastically thanks the Hero for dragging them into this mess, Garth says that he is glad they met and that they will meet again, and Hammer says that "There's nothing left for me here, well, aside from the one thing, the best friend I ever had" as all three are teleported away. Theresa then says that it is time for the Hero to leave; the world is theirs to enjoy, but the Spire is hers alone. Though originally seen as an evil statement questioning Theresa's motives, the answers to why she says this are found in two places:
- In the book entitled "Living Forever: The Immortalists" (which we can only assume Theresa is due to her age), it says that these rare people (the immortals) have a deep-rooted obsession and desire for the power that Old Kingdom rulers had. In her case, they are referencing the Spire.
- In the expansion pack of See the Future, the player meets Theresa again when the Hero is teleported to the Spire; it turns out that she was always planning to use the Spire's power ("yes, the Spire had a gift for me too"), to provide clarity and power to her premonitions, making them easier to read.
Knothole Island
Though many other quests were undertaken by the Hero for renown, gold, and other rewards, one of the more notable ones was depicted in the first downloadable content, Knothole Island. It begins with the Hero spotting a man, Gordon, down by the Bowerstone Market docks who seems to be waiting for someone. He reveals that he is looking for a Hero because his home, Knothole Island, is in trouble.
Gordon takes the Hero to the island in his submarine, and the Hero finds that the place is freezing to death. The Chieftain, the leader of the island, informs the Hero that their warriors died out a long time ago and they were the only ones that had access to the weather shrines, which could quite literally control the weather, and that only a Hero like them could get inside a shrine now to change the weather to warmer conditions. The Hero accepts and with the ice seal, gains access to the ice shrine.
Upon defeating several shadows, the Hero uses the totem to change the weather to scorching conditions which melts all the ice. Now, the Hero may take advantage of some of the stores that were previously closed during the weather, including the Box of Secrets, where "every purchase is a mystery and a surprise" in which the player may trade in certain items for strange new weapons and clothing. Soon, however, the people of Knothole Island became unhappy again as their island was now a wasteland as opposed to a glacier. The Chieftain demands the Hero's help to gain access to the sun shrine. The Hero does not disappoint and activates the storm totem to make it rain all day, as opposed to snowing or flaming. Yet again, however, the Chieftain complains and demands that the Hero return things to the way they were, snowing and freezing.
Upon finding the storm seal, the Hero gains access to the storm shrine and after defeating several shadows and solving several puzzles (again), the island is returned to the glacier that it used to be. The Chieftain thanks the Hero and then asks the people of the island to pay a tax for the maintenance of the weather shrine. They refuse, as the Chieftain got them into this problem in the first place. The Hero may have sided with the Chieftain to get ten thousand gold, or with Jessica (the manager of the Box of Secrets) to earn the respect and love of the people of the island, which would result in the exile of the Chieftain. The Hero, regardless, gains access to the Weather Chamber and the power to change the island's weather whenever it suited.
Also, if the Hero goes to the island after completing the main quest and they chose the Needs of the One or the Needs of the Many, they may trade the soul of a person in a strange shrine for the soul of their deceased dog. However, no morality or purity is lost for doing this.
Seeing the Future
In the second downloadable content See the Future, the Hero is given one last quest in which Murgo, the man who sold the Hero the music box many years ago, has returned to Bowerstone with more "interesting" items. One such item is a cursed snowglobe which actually appears to be the resting place for the souls of those who inhabited Oakvale before it was destroyed by Reaver. All the colour has been drained from their world and the inhabitants ask the Hero to help them. It turns out Shadow Worshippers were responsible for this, and after they are killed, all the colour returns to the world, allowing the ghosts of Oakvale to rest in peace.
The second item the Hero gets from Murgo, a cursed skull, takes them to a region (similar to Westcliff in a few ways) where a knight is caught in a large skull because of what he says was a necromancer who cursed him to be stuck there forever. The knight asks them to retrieve wisps which help to unlock the chains that hold him. To do this, the Hero must wear ridiculous outfits such as Hobbe, Balverine, and Hollow Man costumes. Upon delivering the wisps, it is revealed that the so-called knight is the necromancer himself. The Hero defeats him and leaves.
Upon exiting, Murgo's source comes through and he gives the Hero a model replica of the Spire, which he claims will give the Hero a small glimpse into the future. It turns out that Theresa was the source and, upon using the model, the Hero is teleported to the Spire itself. It is here that Theresa admits that the Spire had a gift for her, too: The ability to see all possible futures. The Hero takes Theresa's hand one last time and sees their future: the Hero is the ruler of all of Albion, with loyal guards and subjects who either fear their wrath or look to them for guidance. Theresa deems none of this as important, though, and says the only thing that matters is the Hero's unborn child, and that this child is destined for greatness and the fate of all of Albion will lie in their hands, along with the fate of Aurora. Theresa tells the Hero that, for now, they must live their life, and that she will always be watching them.
On returning from the Spire, the Hero receives the Royal Suit, and Murgo delivers one last mystical item. This one is different from the others, and is a replica of a Colosseum. Upon activating it, you are teleported to an arena where you fight waves of enemies (everything from beetles to Spire Guards). The new arena holds records and has different awards, and if you get the Ultimate Prize from 15,000 points, you are rewarded with the Royal Sceptre.
Fable III
It is told that, sometime after the end of Fable II, the Hero of Bowerstone unites Albion under a monarchy through "strength, cunning, and conviction". It is indicated that the Hero raised what is known in Fable III as the "old guard", which was led by such men as Major Swift and Sir Walter Beck; the remnants of this guard can be seen throughout Albion and eventually Aurora, and act as town guards did in Fable and Fable II. Walter was a good friend to the Hero, as he fought alongside them and eventually became their personal advisor once they claimed the throne.
The Hero also opened the Brightwall Academy, which was the greatest hub of learning throughout Albion. Deep within the academy, they also built a reliquary which housed some of their greatest possessions, amongst which was the music box used to stop Lucien from destroying Albion.
Some time during their reign, the Hero married and had two children: Logan and the Hero of Brightwall. Nearly fifty years into their reign, the Hero died, and the Hero and their spouse were buried in the royal gardens side by side. Hidden within the Hero's tomb was the Guild Seal, an item needed to unlock the Reliquary.
The Hero left their kingdom to their eldest child, Logan, upon their death.
Powers and Abilities
As a member of the Archon's bloodline, the Hero of Bowerstone was one of the most powerful Heroes in history. As a descendant of William Black, they could use all three Heroic virtues and were extremely skilled in each of them. Due to this, they were the most powerful Hero of their generation.
Training themself from childhood, the Hero unlocked their true power after visiting the Chamber of Fate. Throughout their adventures, the Hero defeated countless formidable opponents, including the Commandant, Captain Dread, Darius Zing, Ripper, Thag, and Dash, as well as countless hordes of creatures such as hollow men, balverines, shadows, bandits, and hobbes single-handedly. Throughout their journey, the Hero was also able to pass all stages of the Crucible intact, a feat duplicated by very few throughout history, and was even able to resist the horrible power of one of the most powerful weapons of the Old Kingdom, the Spire. The Hero also demonstrated their incredible resolve when fighting through the cursed Wraithmarsh and staving off death as a child after being shot by Lucien and falling from the heights of Fairfax Castle.
Years after Lucien was defeated, the Hero of Bowerstone also demonstrated their cunning and intelligence when achieving a feat unheard of since the Old Kingdom: Uniting Albion under a strong monarchy, clearing the path for Albion to undergo its Industrial Revolution. Nevertheless, despite their considerable power, Theresa believed that the Hero of Bowerstone was not powerful enough to defeat the looming forces of the Darkness, revealing in the Road to Rule that she manipulated events so the Hero would produce an even-more powerful heir, even though said heir required the use of special gauntlets to use their Will.
Trivia
- The Hero of Bowerstone, during Fable III, is known as the "Old Hero King/Queen" instead of "Sparrow" or any other name the player chose.
- The Hero of Bowerstone's gender in Fable III is determined based on the player's Fable II save data.
- The Hero of Bowerstone is male by default in a game of Fable III played without a Fable II save game.
- The Hero of Bowerstone is also established as male in the novel, Fable: The Balverine Order (set between Fable II and III). Several of the characters refer to the "King" of Albion as being the last of the Heroes, i.e. Sparrow (The Hero of Bowerstone).
- Male Sparrow is voiced by professional voice actor Nolan North.
- When the player fully establishes Driftwood in Fable III, a caravan can be found which is named "Sparrow's Caravan".
- The playable character Hero in Fable Heroes is based on the male Hero of Brightwall, created in celebration for him assuming the throne in Fable III. However, all the in-game references to Hero are recreations of actions the Hero of Bowerstone performed in Fable II.
- While communicating almost completely through expressions, the Hero seems to be able to talk, as with the "play dead" expression, he very clearly says "Got you."
- In rare instances, while interacting with a villager in Fable III, they will say 'My grandfather was murdered under a clock tower by some nutter named Sparrow.'
- During childhood, the hero of bowerstone is significantly bigger than other children which due to some dialogue are confirmed to be 9 years old meaning the hero of bowerstone is either older than the others or maybe their hero blood make sense them bigger if they are older they would be at least 20 by the time they wake up in the gypsy camp because it says 10 years passed since their childhood.
References
Template:Heroes